
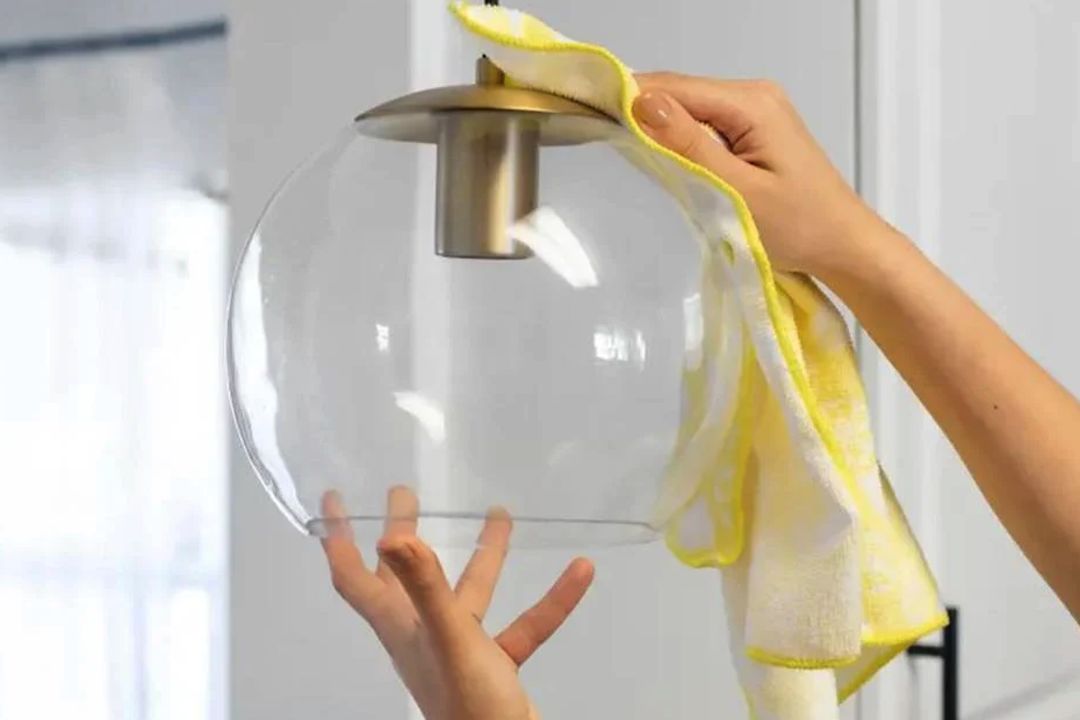
Cleaning your kitchen ceiling lights isn’t just about making them sparkle; it’s a practical step to ensure optimal brightness, extend bulb life, and maintain a healthier kitchen environment. Dust, grease, and cooking fumes quickly accumulate, dimming your lights and potentially creating fire hazards if left unchecked. A regular cleaning schedule, coupled with some basic maintenance, can make a surprising difference in both the aesthetics and functionality of your kitchen.
Essential Safety First
Before you even think about touching your kitchen lights Ebonsi, safety has to be your absolute priority. Working with electricity and heights requires careful attention to detail to avoid injury or damage. Don’t skip these crucial steps.
Power Down Completely
This is non-negotiable. Locate the circuit breaker that controls your kitchen lighting and switch it off. Don’t rely solely on the wall switch; someone could accidentally flip it back on, or there might be residual current. If you’re unsure which breaker it is, it’s safer to shut off the main power to your entire home temporarily. Test the light switch after flipping the breaker to confirm the power is off – the light shouldn’t come on.
Stable Access Equipment
A wobbly chair is an accident waiting to happen. Invest in or borrow a sturdy stepladder or step stool. Ensure it’s placed on a level, dry surface. If you have someone available, having them hold the ladder steady is always a good idea, especially if you’re reaching. Don’t overextend yourself or lean too far; reposition the ladder as needed.
Gather Your Tools
Having everything within arm’s reach before you start climbing will save you time and multiple trips up and down the ladder. This also prevents you from trying to balance items while on a ladder. A small caddy or even a bucket can be useful to hold your supplies.
Protective Gear
While not always strictly necessary for basic cleaning, a pair of clean work gloves can protect your hands from dust and cleaning solutions. If you have allergies, a dust mask might be beneficial. Safety glasses are also a good idea, especially if you’re working with cleaning sprays or there’s a risk of debris falling.
Understanding Different Light Fixture Types
Kitchen ceiling lights come in a wide variety of styles, and each type presents slightly different challenges and considerations when it comes to cleaning and maintenance. Knowing what you’re dealing with will help you choose the right approach.
Recessed Lighting (Can Lights)
These lights are typically flush with the ceiling, with the bulb set back inside a housing. The main parts you’ll deal with are the trim (the visible ring) and sometimes a baffle or reflector.
- Cleaning: The trims often accumulate dust and grease. Some trims can be twisted or pulled off for easier cleaning. The inside of the can might also gather dust, but cleaning this usually requires a duster with an extendable handle.
- Maintenance: Check that the springs or clips holding the trim in place are secure. If using older incandescent or halogen bulbs, check for any browning or scorching around the trim, which could indicate overheating or an incorrect bulb wattage.
Flush Mount Fixtures
These are fixed directly to the ceiling, usually with a glass or plastic dome or bowl that covers the light bulbs. They are very common in kitchens due to their low profile.
- Cleaning: The cover is the primary area for dirt and grease collection. These usually twist off or are held in place by small screws or clips. The inside of the cover will also be dusty, as will the bulbs themselves.
- Maintenance: Inspect the screws or clips that hold the cover in place to ensure they are secure and not stripped. Check the seals or gaskets (if present) around the cover for cracks or damage, as these help keep moisture and pests out.
Semi-Flush Mount Fixtures
Similar to flush mount but with a short stem or chain that creates a small gap between the fixture and the ceiling. This gap allows for some upward light dispersion.
- Cleaning: The glass or plastic diffuser or shade is the main cleaning target, similar to flush mounts. The stem and base of the fixture also accumulate dust. The space between the fixture and the ceiling can also trap dust.
- Maintenance: Check the stem or chain connection points to ensure they are tight and secure. Look for any wobble in the fixture. Ensure the decorative elements are firmly attached.
Pendant Lights and Chandeliers
These fixtures hang down from the ceiling, often with multiple arms, shades, or decorative elements. They can range from simple single pendants to elaborate multi-bulb chandeliers.
- Cleaning: These are often the most challenging due to their intricate designs and multiple surfaces. Individual shades, glass globes, crystals, and metal arms all need attention. They are also prone to accumulating dust on all upward-facing surfaces.
- Maintenance: Regularly check the chain or rod that supports the fixture for any signs of wear, rust, or loose connections. For chandeliers, inspect each arm and bulb socket for security. Ensure all decorative elements, especially glass or crystal, are securely attached.
Track Lighting
This system consists of multiple light heads mounted on a track, allowing for adjustable directionality.
- Cleaning: Each individual light head and its housing will need to be wiped down. The track itself can also collect dust and grease.
- Maintenance: Ensure each light head is firmly seated in the track and can be moved smoothly. Check the electrical connections at the end of the track for security.
Step-by-Step Cleaning Process
Once you’ve ensured safety and identified your fixture type, you can dive into the actual cleaning. This systematic approach helps ensure a thorough job.
Removing Covers and Shades
Carefully remove any glass or plastic covers, diffusers, or shades. For flush and semi-flush mounts, these often twist counter-clockwise or are held by small thumbscrews or clips. For recessed lights, trims might pull straight down or twist. Pendant lights may have shades that screw on or are held by clips. Always use gentle force to avoid breaking delicate components. Place removed parts on a clean, soft towel on a stable surface.
Dusting and Initial Wipe Down
Before introducing any moisture, dry dust all accessible surfaces. Use a soft, dry cloth, a microfiber duster, or a soft-bristled brush. This removes the loose dust and prevents it from turning into muddy streaks when wet cleaning. Pay attention to the ceiling around the fixture, the base of the fixture, and the bulbs themselves.
Cleaning Bulbs
If your bulbs are removable (and you’ve confirmed the power is off and they’re cool), gently unscrew them. Wipe them down with a dry microfiber cloth. If they’re particularly greasy, a very slightly damp cloth (dampened with plain water) can be used, but ensure they are completely dry before reinserting them. Never immerse bulbs in water. For LED bulbs, a dry wipe is usually sufficient.
Washing Covers and Shades
This is where the real grime tackling happens.
- Glass and Hard Plastic: Fill a sink or basin with warm water and a small amount of mild dish soap. Submerge the glass or plastic components. Allow them to soak for a few minutes to loosen grease. Use a soft sponge or cloth to gently wipe away accumulated grease and dust. For stubborn spots, a gentle scrub with a soft brush might be needed. Rinse thoroughly under clean, warm running water.
- Fabric Shades: Fabric shades are trickier. If removable, check the manufacturer’s instructions. Often, a lint roller or a soft brush attachment on a vacuum cleaner is best for dry dust. Spot cleaning with a very mild fabric cleaner might be possible, but always test in an inconspicuous area first. Avoid saturating fabric shades with water, as this can cause staining or warping.
- Crystals (Chandeliers): For crystal chandeliers, you can either clean each crystal individually in a mild soap and water solution, or use a specialized crystal cleaning spray (available at hardware or lighting stores) that allows you to spray and drip dry without wiping. If using the latter, place a drop cloth or newspaper underneath to catch the drips.
Cleaning Fixture Base and Housing
Once the covers are off, you have better access to the fixture’s base.
- Wipe Down: Use a clean, damp cloth (dampened with plain water or a very mild all-purpose cleaner) to wipe down the metal or plastic base of the fixture, paying attention to areas where the cover attaches. Avoid spraying liquids directly onto electrical components. Spray the cloth first.
- Stubborn Grease: For stubborn, caked-on kitchen grease, a degreaser formulated for kitchen surfaces can be effective. Apply it sparingly to a cloth, wipe the greasy area, and then immediately wipe with a clean, damp cloth to remove any residue. Again, keep liquids away from wiring and sockets.
Drying Thoroughly
This step is critical to prevent water spots and electrical hazards. Allow all components, especially glass covers and bulbs, to air dry completely or meticulously dry them with a clean, lint-free microfiber cloth. Any residual moisture can lead to unsightly streaks or, more importantly, can cause short circuits when power is restored.
Reassembly
Once everything is sparkling clean and dry, carefully reassemble the fixture. Replace the bulbs, then reattach the covers or shades, ensuring they are securely fastened. Don’t overtighten screws, especially on glass components, as this can cause them to crack.
Smart Maintenance Tips
Cleaning is just one part of the equation. Regular, proactive maintenance can prevent major issues and keep your lights performing their best.
Regular Dusting Schedule
Don’t wait until you can see a thick layer of grime. Make dusting your kitchen ceiling lights part of your regular kitchen cleaning routine, perhaps every month or two. A quick pass with a duster or a soft-bristled brush can prevent heavy grease buildup. This is especially easy for recessed lights and the visible parts of flush mounts.
Check for Loose Connections
Periodically, when you’re cleaning, gently test for any wobbling or loose components. This applies to the fixture itself (if it’s a pendant or semi-flush), as well as individual bulbs and decorative elements. Tighten any loose screws or nuts you find, but be careful not to overtighten.
Inspect Wiring (Visually)
While you should never mess with actual wiring connections unless you’re a qualified electrician, you can visually inspect exposed portions of wiring for any signs of damage, fraying, or discoloration when the power is off. If you spot anything concerning, contact a professional electrician immediately.
Upgrade to LED Bulbs
If you’re still using incandescent or halogen bulbs, consider switching to LEDs.
- Less Heat: LEDs produce significantly less heat, reducing the risk of heat-related damage to fixture components and potential fire hazards. This is particularly beneficial in a kitchen where ambient temperatures can already be higher.
- Longer Lifespan: LEDs last much longer, meaning less frequent bulb changes, which is a big advantage for hard-to-reach ceiling lights.
- Energy Efficiency: They use less electricity, saving you money on your energy bills.
- Easier Cleaning: LEDs typically run cooler, which means less likelihood of cooking grease baking onto their surface, making them easier to clean with a simple dry wipe.
Addressing Pest Issues
Kitchens can be attractive to small insects. If you find dead bugs inside your flush mount or semi-flush covers, it might indicate a small gap where they are getting in. When reassembling, ensure the cover is tightly sealed. If there’s a gasket, check its condition. For persistent issues, you might need to look into general pest control measures for your home.
Handle Glass and Delicate Parts Carefully
Always use two hands when handling large glass covers or delicate decorative elements. Store them in a safe place while you clean other parts of the fixture, away from edges where they could be knocked off. Wrapping them in a soft towel can provide extra protection.
When to Call a Professional
While most light cleaning and basic maintenance can be handled by a homeowner, there are times when it’s best to bring in the experts. Recognizing these situations can prevent further damage or personal injury.
Electrical Issues Beyond Bulbs
If you notice flickering lights that aren’t resolved by changing the bulb, buzzing sounds from the fixture, or strange smells (like burning plastic), do not attempt to fix it yourself. These are signs of potentially serious electrical problems that require a licensed electrician. Immediately turn off the power to the circuit.
Damage to the Fixture Itself
If the fixture housing is cracked, scorched, or showing signs of rust that are more than surface level, or if sockets are visibly damaged, it’s time for a professional assessment. They can determine if repairs are possible or if replacement is necessary.
Intricate or Heavy Fixtures
Large, elaborate chandeliers or very heavy fixtures that are difficult to access or disassemble without specialized tools or knowledge are best left to professionals. Attempting to clean these yourself could lead to damage to the fixture or injury. Many lighting stores offer cleaning services for complex fixtures.
Persistent Moisture Problems
If you continually find moisture or condensation inside your light fixtures, especially in a kitchen where humidity levels can vary, it could indicate a problem with ceiling insulation, ventilation, or even a subtle roof leak. An electrician or a home inspector can help diagnose the root cause.
If You’re Uncomfortable or Unsure
There’s no shame in admitting when a task is beyond your comfort level or expertise. If you’re hesitant about working on a ladder, dealing with electrical components, or handling delicate fixtures, calling a professional is always the safest and often most efficient option. It’s better to invest in professional help than risk an accident or damage.
By following these guidelines for cleaning and maintenance, you’ll not only keep your kitchen ceiling lights shining brightly, but you’ll also ensure they operate safely and efficiently for years to come. A little regular attention goes a long way in preventing bigger problems down the line.